Update events with Drag & Drop in JavaScript FullCalendar
- Tech Area
- April 30, 2023
In this post, we will learn how to drag and drop events fetched dynamically from the database using PHP and MySQLi in JavaScript FullCalendar. If you are working on event management website like schedule any event or plan any task on particular date and that details you want to show on web page in calendar format, then you can achieve this task using JavaScript FullCalendar plugin.
Files used in this tutorial:
1- connection.php (database connection file)
2- index.php (to create event, start date and end date)
3- view-calendar.php (to show events into the calendar)
4- update.php (to update events)
Below are the step by step process of how to update events with drag and drop in JavaScript FullCalendar.
Step 1: Create a Database connection
In this step, create a new file connection.php to create database connection.
connection.php
<?php
$server = "localhost";
$username = "root";
$password = "";
$database = "college_db";
$connection = mysqli_connect("$server","$username","$password");
$select_db = mysqli_select_db($connection, $database);
if(!$select_db)
{
	echo("connection terminated");
}
?>
Step 2: Create Event Form
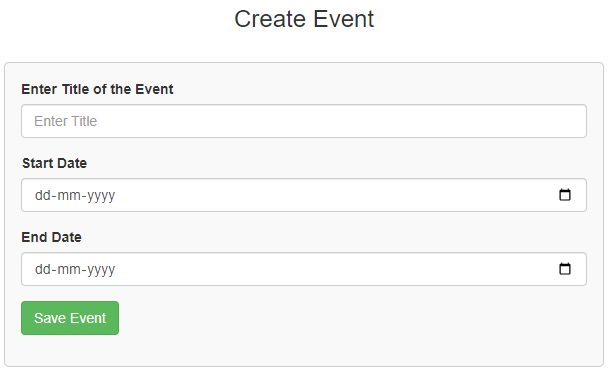
Now create a new file index.php This is the main file used for event form to insert events details into the database. First, we will create an HTML form which have three fields i.e event title, event start date and event end date.
This screenshot shows the UI for event form.

index.php
<html>
<head>
    <title>JavaScript FullCalendar</title>
    <link rel="stylesheet" href="https://maxcdn.bootstrapcdn.com/bootstrap/3.3.6/css/bootstrap.min.css" />
</head>
<style>
 .box
 {
  width:100%;
  max-width:600px;
  background-color:#f9f9f9;
  border:1px solid #ccc;
  border-radius:5px;
  padding:16px;
  margin:0 auto;
 }
 .error
{
  color: red;
  font-weight: 700;
}
</style>
<?php
include('connection.php');
if(isset($_REQUEST['save-event']))
{
  $title = $_REQUEST['title'];
  $start_date = $_REQUEST['start_date'];
  $end_date = $_REQUEST['end_date'];

  $insert_query = mysqli_query($connection, "insert into tbl_event set title='$title', start_date='$start_date', end_date='$end_date'");
  if($insert_query)
  {
    header('location:view-calendar.php');
  }
  else
  {
    $msg = "Event not created";
  }
}
?>
<body>
    <div class="container">
    <div class="table-responsive">
    <h3 align="center">Create Event</h3><br/>
    <div class="box">
     <form method="post" >
       <div class="form-group">
       <label for="title">Enter Title of the Event</label>
       <input type="text" name="title" id="title" placeholder="Enter Title" required
       data-parsley-type="title" data-parsley-trigg
       er="keyup" class="form-control"/>
      </div>
      <div class="form-group">
       <label for="date">Start Date</label>
       <input type="date" name="start_date" id="start_date" required
       data-parsley-type="date" data-parsley-trigg
       er="keyup" class="form-control"/>
      </div>
      <div class="form-group">
       <label for="date">End Date</label>
       <input type="date" name="end_date" id="end_date" required
       data-parsley-type="date" data-parsley-trigg
       er="keyup" class="form-control"/>
      </div>
      <div class="form-group">
       <input type="submit" id="save-event" name="save-event" value="Save Event" class="btn btn-success" />
       </div>
       <p class="error"><?php if(!empty($msg)){ echo $msg; } ?></p>
     </form>
     </div>
   </div>
  </div>
 </body>
</html>
Step 3: Create view-calendar.php
Now create a new file view-calendar.php This file is used to show fetched events in the calendar.
view-calendar.php
First of all include necessary CSS and JavaScript library.
<link rel="stylesheet" href="https://maxcdn.bootstrapcdn.com/bootstrap/3.3.6/css/bootstrap.min.css"/>
<link rel="stylesheet" href="https://cdnjs.cloudflare.com/ajax/libs/fullcalendar/3.4.0/fullcalendar.css" />
<script src="https://cdnjs.cloudflare.com/ajax/libs/jquery/3.2.1/jquery.min.js"></script>
<script src="https://cdnjs.cloudflare.com/ajax/libs/moment.js/2.18.1/moment.min.js"></script>
<script src="https://cdnjs.cloudflare.com/ajax/libs/fullcalendar/3.4.0/fullcalendar.min.js"></script>
Now create body for calendar.
<body>
  <h2><center>Javascript Fullcalendar</center></h2>
  <div class="container">
   <div id="calendar"></div>
  </div>
  <br>
</body>
After this, fetch events from the database and create function eventDrop to update fetched events with drag and drop.
<?php
include('connection.php');
$fetch_event = mysqli_query($connection, "select * from tbl_event");
?>
<script>
    $(document).ready(function(){
        $('#calendar').fullCalendar({
            header:
            {
                left: 'month, agendaWeek',
                center: 'title'
            },

            events:[
            <?php
            while($result = mysqli_fetch_array($fetch_event))

                {?>
            {
                id: '<?php echo $result['id'];?>',
                title: '<?php echo $result['title'];?>',
                start: '<?php echo $result['start_date'];?>',
                end: '<?php echo $result['end_date'];?>',
                color: 'yellow',
                textColor: 'black'


            },
          <?php } ?>
            ],
            editable: true,
            eventDrop: function(event)
            {
                var start = $.fullCalendar.formatDate(event.start, "Y-MM-DD HH:mm:ss");
                var end = $.fullCalendar.formatDate(event.end, "Y-MM-DD HH:mm:ss");
                var title = event.title;
                var id = event.id;
                $.ajax({
                    url: "update.php",
                    type: "POST",
                    data: {title: title, start: start, end: end, id:id},
                    success: function()
                    {
                        alert("Event Updated Successfully");
                    }
                });
            }
        });
    });
</script>
Step 4: Create update.php
Now create a new file update.php This file is used to update events in to the database.
update.php
<?php
include ("connection.php");
if(isset($_POST['id']))
{
	$title = $_POST['title'];
	$start_date = $_POST['start'];
	$end_date = $_POST['end'];
	$id = $_POST['id'];

	$update_query = mysqli_query($connection, "update tbl_event set title='$title', start_date='$start_date', end_date='$end_date' where id='$id'");
}
?>
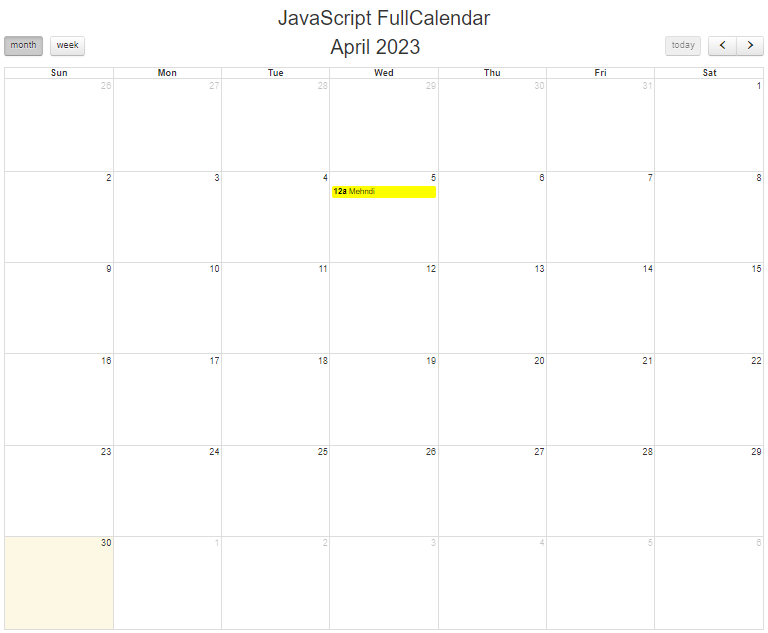
Output

Join 10,000+ subscriber
